Contents
- Index
Reports
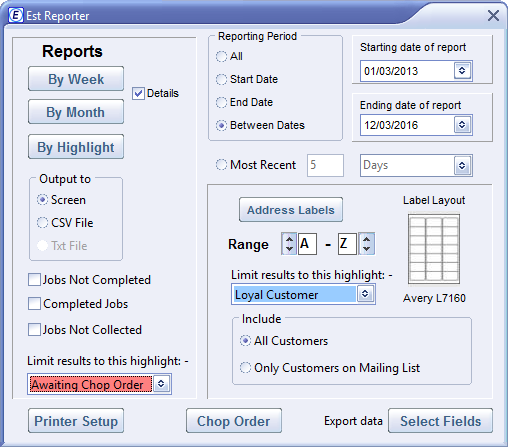
Define the type of report
Choose either By Week or By Month as required.
When the Details box is checked the report will display a line for each job, within the reporting period, with a summary line at the end of each Week/Month.
When the Details box is unchecked, the report will only contain a single line for each Month/Week within the reporting period.
Defining the Period
By default all jobs will be included in the report, but this can be easily modified.
To report on all jobs, beginning at a certain date, chose Start Date.
To report on all jobs before at a given date, chose End Date.
To report on jobs within two dates, chose Between Dates.
Setting a date is simplified by clicking on the down-arrow to the right of the date box. Use the calendar which appears, to select the required date. Note that the right and left buttons in the calendar move the date forward or back by one month.
User-defined Reports
If You have enabled Highlights in the Options Screen, you can limit the content of your report to jobs that are highlighted with the colour you select from the drop-down list.
Address Labels
Customer's names and addresses can be printed on self-adhesive labels, but only in a 3 x 7 matrix. However labels of the required dimensions are available from any good office suppliers.
By default all names (A - Z) will be printed, but if you wish the range can be limited to any required sub-range within the alphabet. For example A - F, K - Q, F - F, etc.
If You have enabled Highlights in the Options Screen, you can limit the labels to the customers that have been highlighted with the colour you select from the drop-down list.
Exporting Reports
As well as printing, the contents of any report can be saved to file. Four formats are available.
1. QRP Quick report native format - the default.
2. TXT Text file. This can be read by any word processor or text editor (My favourite - EditPad Lite, it's free)
3. HTM HTML. Can be read by a web browser and many word processors. Output may not accurately match the original
4. CSV Comma separated. This format can be read by just about every database program such as Access, Dbase, Foxpro, etc. and also many spreadsheets, such as Excel.
Chop Order
Click this button to create chop orders to each of your suppliers from the jobs that are currently highlighted as Chop. The order form will contain all of the information that is required by your supplier to complete the order, and will be in the form of a PDF attachment to an email addressed to the supplier. This is done automatically, but you have an opportunity to edit the email before sending. If you wish to customise the email message to your supplier, prepare the message in a text editor such as notepad and save it as ChopEmail.txt, then drag ChopEmail.txt on to the main screen of EstLite. The next Chop order will then have that email message, with the order details as a PDF attachment.
Select Fields
This allows you to choose the Customer and Job fields that you would like to export as raw data to third party applications such as spreadsheets and database managers. This gives you complete control over the information that you export rather than being restricted to just the data contained in the reports.
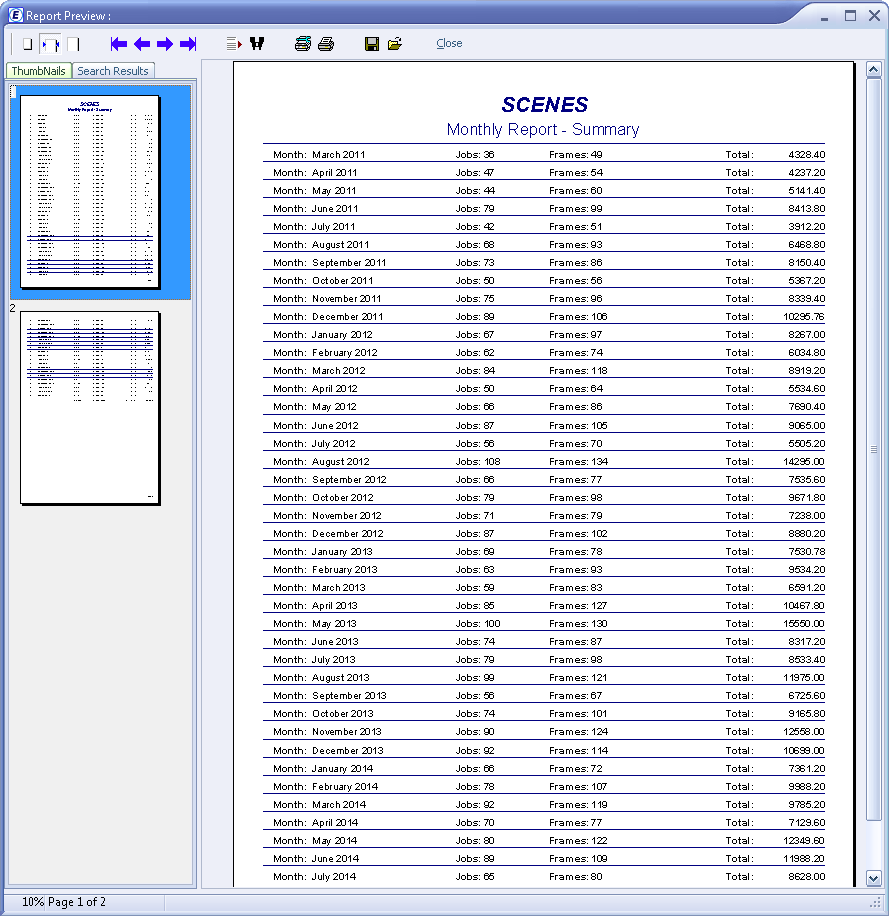
Example Monthly Report
Details box unchecked
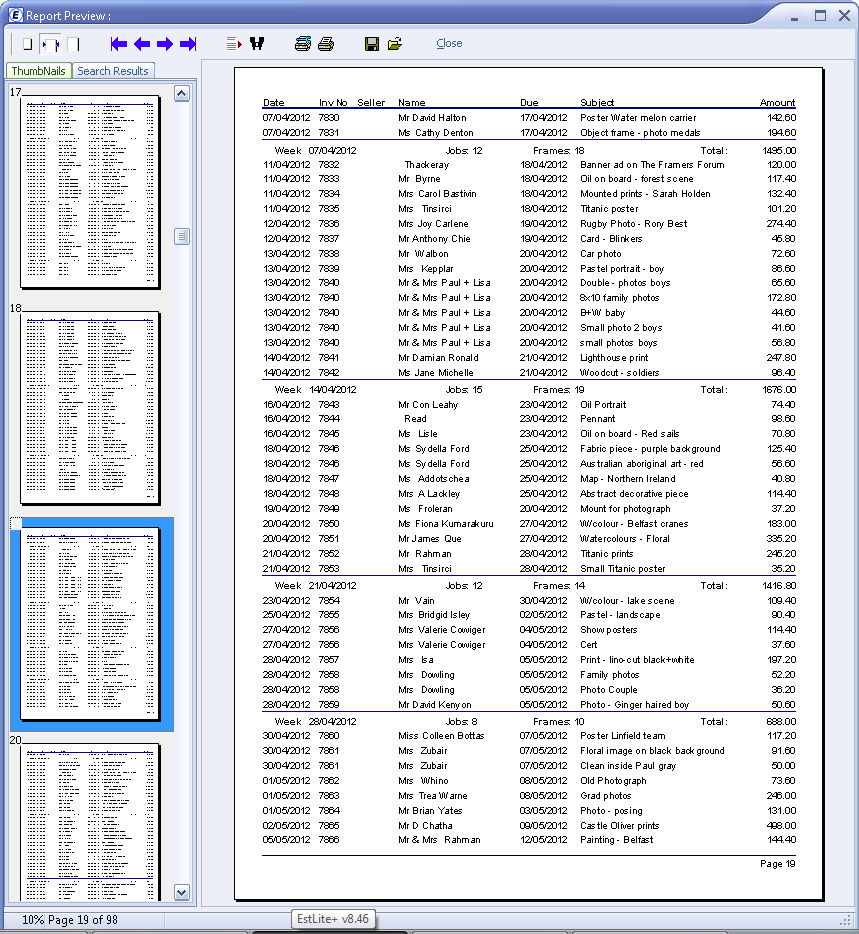
Example Weekly Report
Details box unchecked
Main Help Screen