Contents
- Index
History (Customers and jobs)

Click on the image for more information
You can stretch this window by dragging the sides with your cursor, or fill the screen by clicking on the maximise button.
This screen is reached by clicking on the History button in the Customer screen.
When moving through the jobs, use the Job Owner button to point to the customer who owns the job pointed to in the Jobs Grid.
The columns in the grids may be re-arranged by dragging the column header (at the top of each column) to a new position. Columns can be re-sized by placing the cursor between columns and dragging left or right to the desired width.
You can click on the bar between the two grids and drag up or down to maximise either customer or job data.
Find
Enter the date, invoice number, name, or other text into the find box then click on the relevant column header.
Mailing List
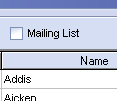
A tick indicates that the customer is on the mailing list. If it is greyed out it shows that the box was not checked when the customer details were originally entered. Edit the box by clicking on it with the mouse pointer.
Re-Use Customer
Click on this button to use the customer details pointed to in the Customer grid. These details will appear on the invoice.
The same result is achieved by double clicking on the appropriate row of the Customer grid.
Find Invoice Number
To locate an invoice, type in the number, and press the Enter key.
Job Owner

When you click on this button, the pointer in the Customer grid locates the owner of the job pointed to in the Job grid.
Jobs Displayed
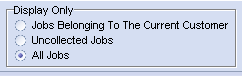
Click the appropriate radio button to toggle between showing all jobs, showing only jobs which have not yet been collected, or showing only the jobs belonging to the customer pointed to in the Customer grid. When Jobs Displayed is Uncollected Jobs, you can reprint the dockets for all the jobs awaiting collection (See Reprint Invoice - below).
Jobs Completed

Place a tick in the box to indicate that a job has been completed. (When a job has been collected, it is automatically shown to have been completed.). When you place a tick in the Job Complete box a pop-up will offer you the option of notifying your customer either by text or email. To avoid this pop-up, hold the Ctrl key on the keyboard as you click the Job Complete box.
Jobs Collected
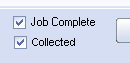
Place a tick in the box to indicate that a job has been collected. Notice that the Date Collected is inserted into the Jobs grid. Each job has to be clicked separately even those which may be grouped on the same invoice. When a job has been collected, it is automatically shown to have been completed.
Reprint Invoice
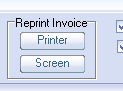
The Print button has two functions depending on which jobs are being displayed.
If jobs displayed are Uncollected Jobs (see Jobs Displayed), you will be given the option of re-printing the dockets of all uncollected jobs, and have the further option of printing the accompanying address labels.
Otherwise, the current job (indicated by the black triangle in the leftmost cell), will get printed along with other jobs, if any, which have the same invoice number.
Uncollected Jobs
This feature allows you to contact owners of uncollected jobs either by email or by text message. You can use one of the three predefined (but completely configurable) messages ranging from a statement informing the customer that their job is ready, to something more compelling, or you can compose your own message. A working email client will be need in order for you to use the email feature. You can personalise messages using pre-defined mailmerge tags.
You can choose to send messages to owners of jobs that are late by a user-defined number of days, or you can elect to send messages to owners of jobs that are highlighted with a particular colour.
More information on the Uncollected
Re-Use Job
The current job (indicated by the black triangle in the leftmost cell), is placed into the frame pricing window and added to the invoice.
The same result is achieved by double clicking on the appropriate row of the Job grid.
Print address Label
Sends the current customer's address to your Dymo LabelWriter if one is available on your system.
Print Frame Label
Prints a single frame label for the current job on your Dymo LabelWriter if one is available on your system.
See Dymo Labels
Main Help Screen
Customer Screen