Contents
- Index
Detail Screen
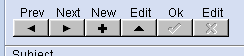
The Navigator Bar
 Detail from the Customer Data (Details) Screen
Customer Information
You have the choice of either selecting an existing customer or generating a new customer record.
New Customer
To create a new customer record click the New button on the navigator bar then fill the blank boxes with the relevant customer information. At any time while entering new customer information, you can abort by clicking on the Edit button of the Navigator Bar. Note that this option is no longer available to you once you move out of the customer data entry area, so in this case to make changes to the customer data you must first click on the Edit button of the Navigator Bar. And when you are satisfied with the changes made, click on the Ok button.
Find Existing Customer
 Detail from the Customer Data (Details) Screen
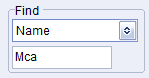
The program immediately starts to search as you type the name you wish to find into the Find box, very often finding the name you are looking for after just the first few letters have been entered. On the other hand, if you have several customers with the same name, you may have to complete the search using the Prev and Next buttons of the Navigator Bar. Use the drop-down list to choose to search for customer by Name, Telephone No, or Postcode.
Mailing List
 Detail from the Customer Data (Details) Screen
Click on the Mail box to add the customer to your mailing list.
.
.
Postcode Look-up
 Detail from the Customer Data (Details) Screen
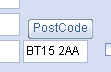
If you have subscribed to EstLite UK Postcode Look-up, you can look up UK addresses by entering the postcode and then pressing the Postcode button.
Mount Colours
 Detail from the Customer Data (Details) Screen
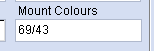
The reference numbers of the mounts which will be used in this job are entered here. If more than one mount is used then the numbers can be entered, separated by slashes, topmost mount to the left.
If no mounts are used in the current job, then the box is disabled.
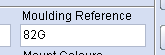
Moulding Reference
 Detail from the Customer Data (Details) Screen
The reference number for the moulding is required before printing can commence. If more than one moulding is used then the numbers can be entered, separated by slashes, topmost moulding to the left. If you have set up a lookup table for your moulding prices, and are pricing by id, then the Moulding Reference will be inserted here automatically.
Note that this is the number which uniquely references the moulding and is NOT the same as the price code.
If no moulding is used in this job, then the box is disabled.
Other (Miscellaneous)
 Detail from the Customer Data (Details) Screen
You will be required to enter here a description for any other price you have included in the main pricing screen.
The description will be entered automatically if the item has been chosen from a list of priced items.
Deposit
 Detail from the Customer Data (Details) Screen
If your customer is leaving a deposit on the work to be done, this is the place to enter it.
The Docket Total is the total value of the current docket, including any pending job.
Reports
 Detail from the Customer Data (Details) Screen
To print Labels and Reports click on the Reports button.
History
 Detail from the Customer Data (Details) Screen
To examine your historical records of customers and jobs click on the History Button.
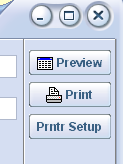
Printing Dockets
 Detail from the Customer Data (Details) Screen
A docket can be printed by pressing the Print Button, or viewed by pressing the Preview button. Printing can also be done from within the preview screen.
Main Help Screen