Contents
- Index
- Previous
- Next
Main Screen
Length & Width
 Detail from Main Screen
Length and width simply refer to the two dimensions of the job and are not specific as to orientation. In other words, the program is not concerned whether the frame is landscape or portrait.
EstLite will happily work in either inches or cms. (See Below)
The dimensions entered into the Length and Width boxes must be the finished overall size of the piece to be framed. Note that the plus (+) sign may be used within these boxes e.g. 41+6+8.
When defining a job, which requires a mount, the breadth of the mount can be added to the dimensions of the artwork. For example if a portrait was to be 45 x 57, and a mount 8cms on top and sides and 12cms on the bottom was specified, then the two dimensions can be entered as [45+8+8] and [57+8+12].
The program will not allow dimensions greater than 250 cms (100 inches)
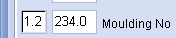
Moulding No
(an alternative to this method is to use Moulding Table)
 Detail from Main Screen
The number entered here is the cost, in pence per metre of the particular moulding. It is a good idea to have this number written on each moulding sample (to convert to cost/metre, multiply by 0.3048). If you do not have the cost per metre you can enter the cost per foot followed by pressing the letter 'F', this will convert the number to cost per metre for you.
If the job requires a double (or triple etc.) frame then the relevant moulding numbers can be added together and entered here. Alternatively, enter the numbers in the box separated by + (plus sign).
When not pricing by Moulding Table, the moulding width is calculated using a rule which assumes a proportional relationship between the cost of the moulding and the price. That is Narrow Moulding = Cheap, Wide Moulding = Expensive.
Stock Warning

If EST determines that the framing job will require more than the available moulding stock, then a warning will be given. This alerts the sales person to be aware that there may not be enough moulding in stock to complete the job.
Mount
 Detail from Main Screen
Some users may prefer to use the term Mat or Matting. This may be changed in the options.
Enter the number of mounts into the Mount Box, usually 1, 2 or 3, but there is an allowable maximum of 10.
The button to the right of the Mount Box allows you to select a different type of mount from a drop-down list (or use Alt-M). Note that the mount type will always revert to the default mount type after the job has been cleared.
The button to the left of the Mount Box (or 'D') brings up a window where the Mount Decoration may be selected.
Mount Warning
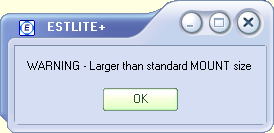
If the mount required is larger than the standard size (set by user), then a warning is given to alert the sales staff that there may be a problem with making a mount of this size.
Glass
Enter the number of glasses in the frame, usually 1.
 Detail from Main Screen
The button to the right of the Glass Box allows you to select a different type of glass from a drop-down list (or use Alt-G). Note that the glass type will always revert to the default glass type after the job has been cleared.
Glass Warning

If the glass required is larger than the standard size (set by user), then a warning is given to alert the sales staff that there may be a problem glazing a job of this size.
Fixing Method
 Detail from Main Screen
Enter 1 to apply a fixing method (dry mount, stretch etc.). The button to the right allows you to select other fixing methods from a drop down list (or use Alt-F).
Other
Enter here any other price which is to be associated with the job.
Number
Enter the number of frames to be made with this specification.
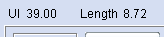
UI (United Inches) - Length
 Detail from Main Screen
United Inches are displayed when Inch is the unit of measurement. The calculated length of moulding is also shown, it includes an allowance for the moulding width and the waste factor.
Unit of Measurement
 Detail from Main Screen
Click here (or press the F10 key) to change the unit of measurement. Note that the unit of measurement will always revert to the default after the job has been cleared.
See : Changing the default unit of measurement
Other Keyboard commands
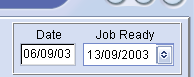
Dates
 Detail from Main Screen
Today's date is displayed on the left; this is determined by your system. Note that you can change your system date and time by double clicking on the time at the extreme bottom right of your screen. The date on the right is calculated by adding the working days turnaround to today's date. This date may be altered manually by clicking on the button and selecting a new date from the calendar.
Note that the format of the date is determined by your system. You can access this from Control Panel/Regional Settings/Date/Short Date Style.
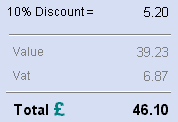
Discount
 Detail from Main Screen
Pressing the % (or press Alt-D) button displays the default discount rate which is immediately applied to the totals. The button on the right allows you to select another discount rate from the drop-down list, or, you can type in the rate if none of the pre-sets are suitable.
Pressing the % (or press Alt-D) for the second time erases the discount calculations.
The discount rate may be set under Options. Note that the discount rate will always revert to the default after the job has been cleared.
Other Keyboard Commands
Moulding Sale
 Detail from Main ScreenPressing the Moulding Sale button brings up a window which will calculate the selling price of moulding sold by length, based on the mark-up on moulding sales set under Options.
{bmc bm15.bmp}
Enter the Moulding Number and length to obtain the price of moulding sold by length.
Other Keyboard Commands
Totals
 Detail from Main Screen
The Total price together with Vat, if any, is displayed in the total box located in the bottom right corner.
If a second currency has been enabled (see Options), You can toggle between the two currencies by clicking on the Currency Symbol or Total.
Clear
 Detail from Main Screen
Pressing the Clear Job button (or press Alt-C) clears all the entries and resets the defaults, ready for a new framing job to be calculated.
Pressing the Clear All button (or press Alt-A) Clears all the jobs (maximum of nine) belonging to the current customer. This is rarely necessary as the jobs are cleared automatically when an Invoice/Framing Docket is printed.
Other Keyboard Commands
Details
 Detail from Main Screen
Pressing the Details button (or Alt-E) takes you the customer Data window. This is where further information regarding customer and job can be entered and stored for future reference. The customer Data window has options for printing the framing docket, viewing the complete history of customers and jobs, and printing reports and labels.
Options
 Detail from Main Screen
Pressing the Options Button (or Alt-N) enables you to define all defaults and prices for the program.
Till
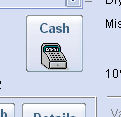 Detail from Main Screen
Pressing the till button, or spacebar on the keyboard, gains access to the till, the till button only appears if the till function has been enabled under options.